Creamy Chocolate Pudding Cups
Highlighted under: Golden Crust & Crumbs
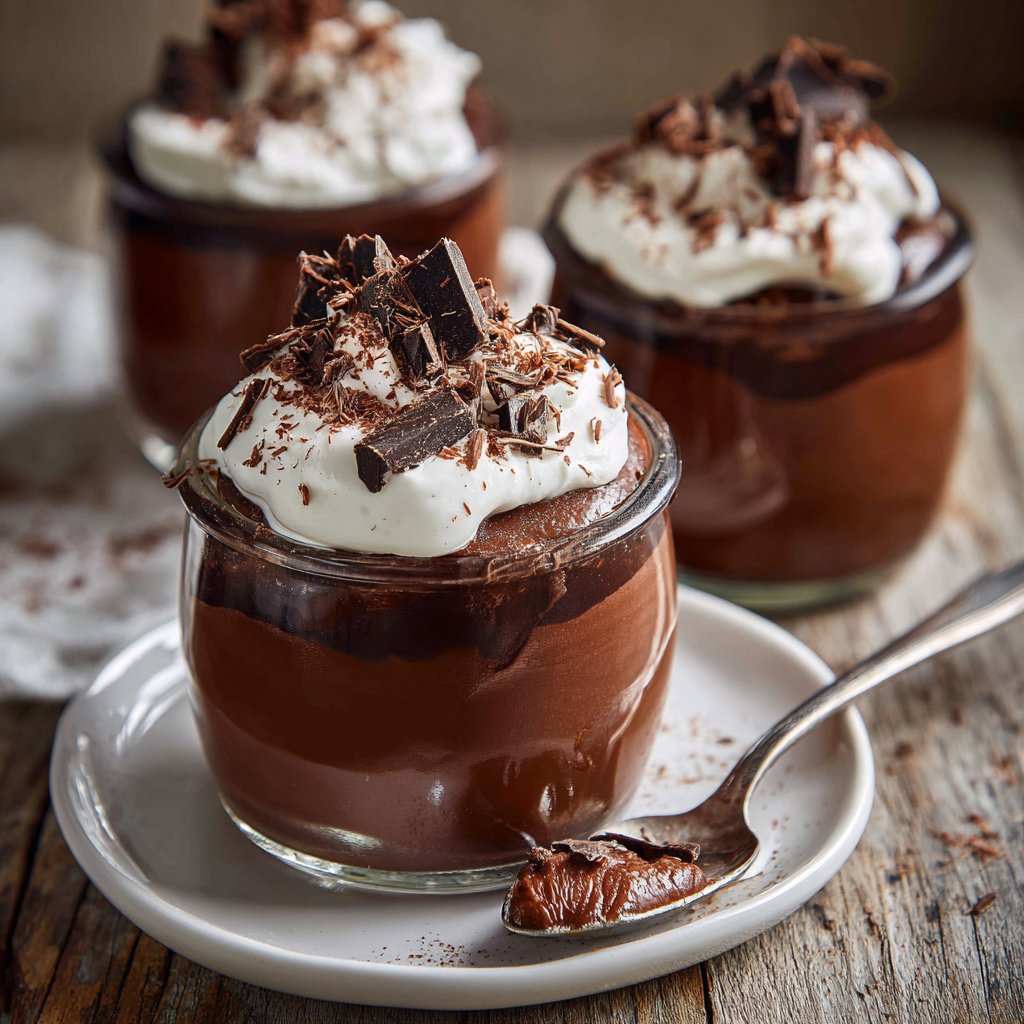
I absolutely love indulging in dessert, and there's nothing quite as satisfying as a silky smooth chocolate pudding. These Creamy Chocolate Pudding Cups have become a go-to treat in our household because they're incredibly easy to make, yet they deliver on rich chocolate flavor. Each spoonful is a luxurious delight, and I've added a touch of vanilla to elevate the taste. Perfect for any occasion, this dessert will leave everyone wanting more and asking for the recipe!
Making these Creamy Chocolate Pudding Cups was such a rewarding experience, especially when I saw how much everyone enjoyed them. I decided to try a method that involves cooking the mixture just right, which gives the pudding the perfect texture. By whisking constantly over medium heat, I ensured no lumps formed, resulting in a smooth and creamy dessert.
I also discovered that letting the pudding chill for a bit allows the flavors to deepen. The rich chocolate flavor combined with the added touch of vanilla really makes these cups stand out. It’s a small detail that elevates the entire dessert!
Why You Will Love This Recipe
- Rich chocolate flavor paired with fresh orange zest
- Creamy texture that melts in your mouth
- Perfect for celebrations or as a sweet indulgence
Perfecting Your Pudding Texture
The texture of your chocolate pudding is crucial for its enjoyment. To achieve that silky consistency, make sure to whisk the dry ingredients thoroughly before adding the milk. Lumps can form if the cocoa powder isn't fully incorporated, leading to a grainy finish. When you cook the pudding, stir constantly to ensure even heat distribution; this prevents scorching on the bottom of the pan and allows the mixture to thicken smoothly.
As the pudding cooks, you'll notice a change in texture. It should reach a gentle boil, where small bubbles break the surface without a vigorous rolling boil. At this stage, you'll want to watch closely to avoid overcooking, which can cause the pudding to become too thick or even curdle. Once it coats the back of a spoon and holds a line when you run your finger across it, you know it's perfectly thickened.
Ingredient Insights
Whole milk is ideal for this recipe because its fat content creates a rich, creamy mouthfeel. If you're looking for a lighter option, you could substitute with 2% milk, but be aware that the texture will be less indulgent. Avoid using skim milk, as it may result in a watery pudding. The unsweetened cocoa powder here is key; it provides that deep chocolate flavor without adding extra sweetness, allowing you to control the overall sweetness with sugar.
Cornstarch acts as a thickening agent and is essential for creating the pudding's silky smoothness. If you have allergies or prefer a different texture, you might experiment with arrowroot powder as a substitute. However, make adjustments to cooking times, as arrowroot can thicken at lower temperatures and may require less cooking than cornstarch.
Serving and Storing Tips
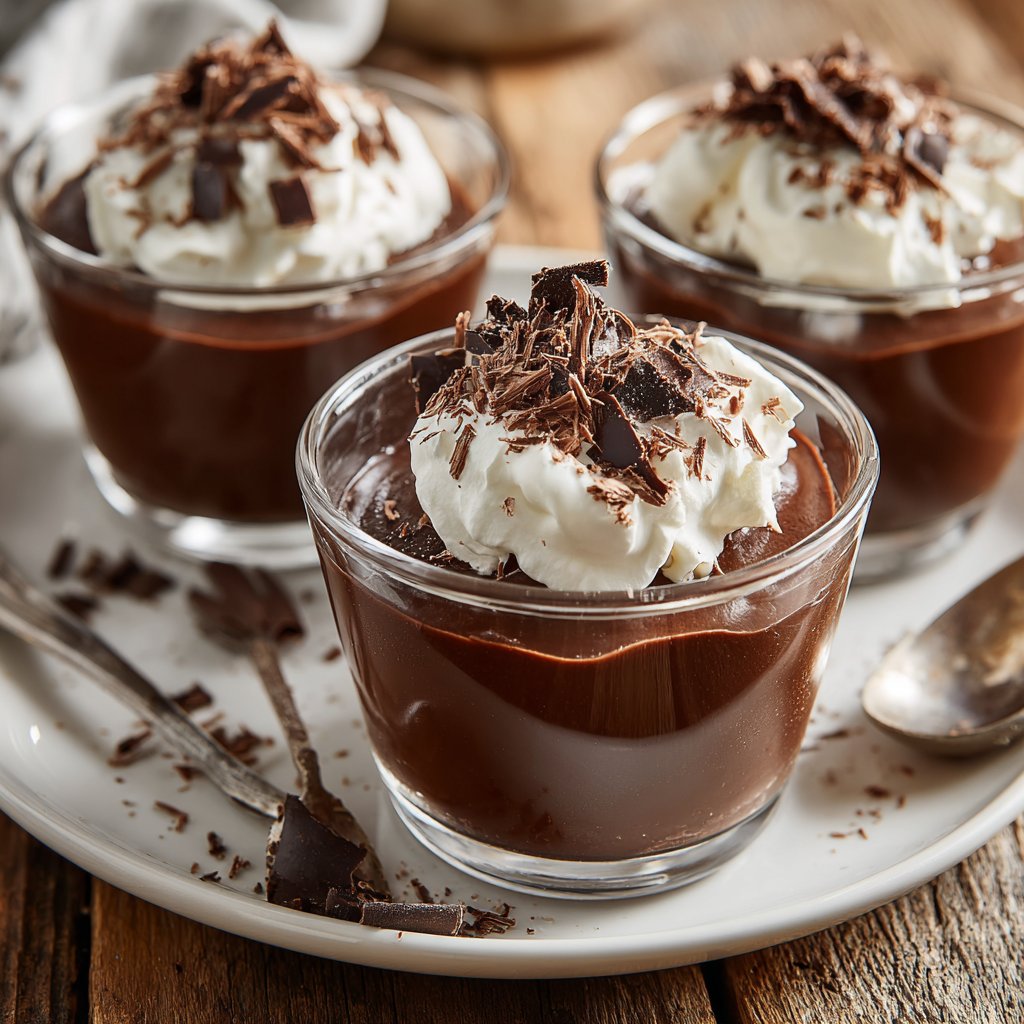
Once your pudding has chilled, it can be served in various delightful ways. For an elegant touch, consider garnishing with freshly whipped cream or a sprinkle of chocolate shavings. Adding a dollop of orange zest-infused whipped cream can enhance both the flavor and aesthetics. If you're feeling adventurous, top it with crushed cookies or nuts for added texture contrast that pairs beautifully with the creaminess.
This pudding can be stored in the refrigerator, covered, for up to five days. To ensure optimal texture, press a piece of plastic wrap directly onto the surface of the pudding before refrigerating; this prevents a skin from forming. If you want to make it ahead of time, it's perfect for preparing a day in advance. Just give it a good stir before serving if it looks a bit set. You can also freeze the pudding for up to three months, but note that the texture may change slightly upon thawing, so it's best enjoyed fresh.
Ingredients
Gather these simple ingredients to create your delicious pudding cups:
Ingredients
- 2 cups whole milk
- 1/2 cup granulated sugar
- 1/3 cup unsweetened cocoa powder
- 3 tablespoons cornstarch
- 1/4 teaspoon salt
- 1 teaspoon vanilla extract
- 1 tablespoon unsalted butter
These ingredients will come together beautifully for a decadent dessert!
Instructions
Follow these steps to create your creamy chocolate pudding:
Combine Dry Ingredients
In a medium saucepan, whisk together the sugar, cocoa powder, cornstarch, and salt until well combined.
Add Milk
Slowly pour in the milk while whisking to avoid lumps. Mix until smooth.
Cook the Mixture
Place the saucepan over medium heat and cook, stirring constantly, until the mixture thickens and comes to a gentle boil. This should take about 8-10 minutes.
Add Flavorings
Once thickened, remove from heat and stir in the vanilla extract and butter until fully melted and combined.
Chill
Pour the pudding into serving cups and refrigerate for at least 2 hours before serving to achieve the best texture.
Once chilled, your pudding is ready to be enjoyed!
Pro Tips
- For an extra touch, consider adding whipped cream or grated chocolate on top before serving. You can also infuse the pudding with different flavors, like peppermint or almond extract, for a unique twist.
Variations to Try
For a different flavor profile, consider infusing the pudding with a hint of espresso or coffee. Simply mix in a tablespoon of instant coffee granules along with the cocoa powder. This addition deepens the chocolate flavor, making it even more decadent. You can also explore using flavored extracts, such as almond or mint, to create unique twists on the classic chocolate pudding.
If you'd like to make this recipe dairy-free, you can substitute whole milk with full-fat coconut milk. This will add a coconut flavor, so keep that in mind when considering toppings. Use dairy-free butter or a plant-based alternative in place of regular butter to maintain the creamy texture.
Troubleshooting Common Issues
If your pudding ends up too thick, you can stir in a bit of additional milk over low heat to loosen it. Just add the milk gradually and whisk until you achieve the desired consistency. Conversely, if your pudding is too thin, cook it a little longer while stirring continuously until it thickens up to your liking. This often happens if the mixture didn’t reach a full boil, which is crucial for fully activating the cornstarch.
It’s normal for the pudding to develop a skin as it cools. If this happens, simply whisk it before serving. To prevent this in the first place, use the aforementioned plastic wrap trick. If you accidentally burn the mixture, you may need to start over; burned chocolate has a distinct, unpleasant flavor that doesn't improve with additional ingredients.
Questions About Recipes
→ Can I use non-dairy milk?
Yes, you can replace whole milk with almond milk or coconut milk for a dairy-free version.
→ How long can I store the pudding?
The pudding can be stored in the refrigerator for up to 3 days, covered tightly.
→ Can I make this pudding ahead of time?
Absolutely! This pudding is perfect for making ahead, just allow it to chill properly before serving.
→ Is it possible to make this recipe sugar-free?
Certainly! Substitute the sugar with a sugar alternative like stevia or erythritol, but please adjust according to your taste as sweetness levels vary.
Creamy Chocolate Pudding Cups
Created by: Imogen Price
Recipe Type: Golden Crust & Crumbs
Skill Level: Easy
Final Quantity: 4 servings
What You'll Need
Ingredients
- 2 cups whole milk
- 1/2 cup granulated sugar
- 1/3 cup unsweetened cocoa powder
- 3 tablespoons cornstarch
- 1/4 teaspoon salt
- 1 teaspoon vanilla extract
- 1 tablespoon unsalted butter
How-To Steps
In a medium saucepan, whisk together the sugar, cocoa powder, cornstarch, and salt until well combined.
Slowly pour in the milk while whisking to avoid lumps. Mix until smooth.
Place the saucepan over medium heat and cook, stirring constantly, until the mixture thickens and comes to a gentle boil. This should take about 8-10 minutes.
Once thickened, remove from heat and stir in the vanilla extract and butter until fully melted and combined.
Pour the pudding into serving cups and refrigerate for at least 2 hours before serving to achieve the best texture.
Extra Tips
- For an extra touch, consider adding whipped cream or grated chocolate on top before serving. You can also infuse the pudding with different flavors, like peppermint or almond extract, for a unique twist.
Nutritional Breakdown (Per Serving)
- Calories: 380 kcal
- Total Fat: 26g
- Saturated Fat: 15g
- Cholesterol: 195mg
- Sodium: 85mg
- Total Carbohydrates: 32g
- Dietary Fiber: 3g
- Sugars: 24g
- Protein: 6g